Triplanar Landscape Blending

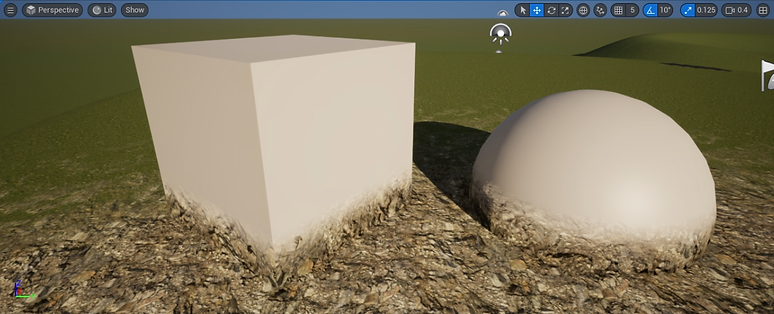
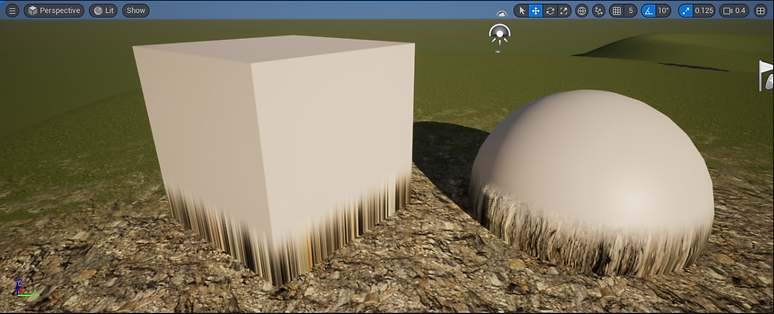
If you've ever tried to set up landscape blending with rocks and other meshes, you've probably run into left example in the picture above. The basic setup involves sending the landscape's height and texture information to a Runtime Virtual Texture, and then sampling that RVT in the object's shader. This can look great on flat meshes that gradually slope away from the landscape, but for any objects that stand vertically we get some ugly texture stretching. This is because the RVT is a flat projection of the landscape along the Z direction, and so any pixels on a mesh that share the same XY coordinates in the world will share the same texture pixel from the RVT.
I wanted to fix this issue by making a "triplanar" version that looks great even on vertical slopes.
The Basic Setup
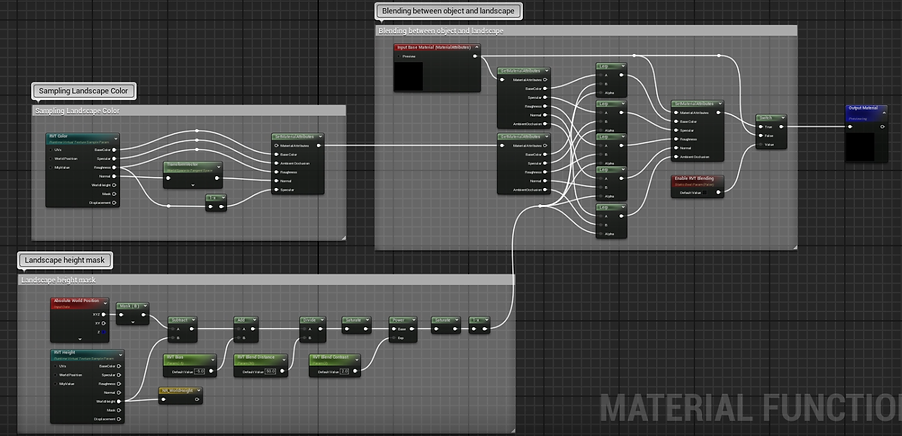
First, we need to set up our landscape shader to be writing out the correct information. I'm not going to go over every step here because there's a million youtube videos that will cover it. I'll just post a picture of the shader setup below.
Two things to note:
-
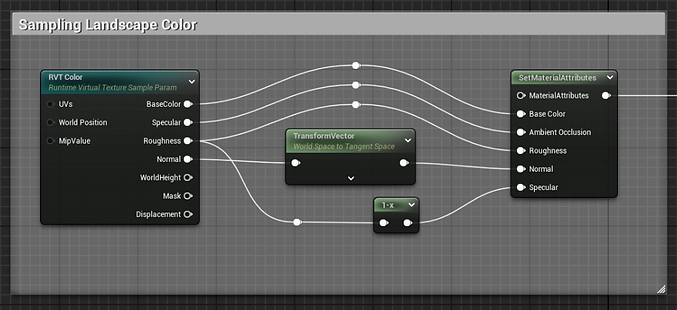
Because Specular is easy to generate from a Roughness or Base Color output, I used the spec channel to hold Ambient Occlusion information instead.
-
In addition to these shader nodes, I also set Tangent Space Normal to False on the landscape shader, because the RVT is inherently sampled in world space.

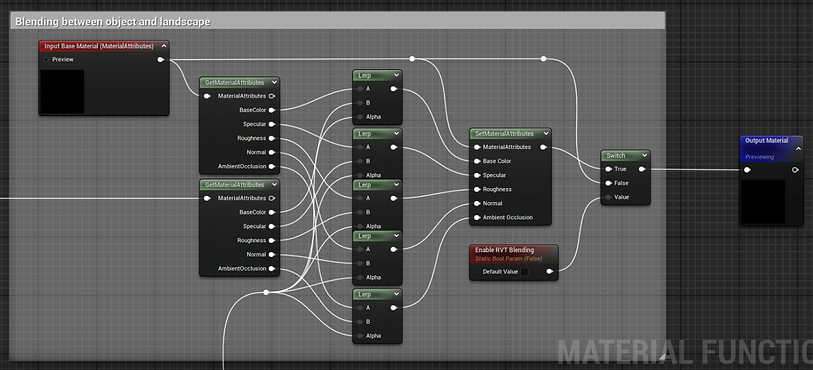
On the object shader's side of things, we sample the two RVT textures we created (Color and Height). We use the height as an alpha to lerp between the object's material information and the landscape's material information.
First we sample the landscape's color RVT. Don't forget to transform the Normals from World back to Tangent!
Then we sample the landscape's height RVT. I've added some extra parameters to control the falloff of the mask.

Finally we put it all together with a series of lerps, using the height RVT as the alpha.
And so doing all that gives us the standard "stretched" blending below, that we commonly see with every Youtube implementation of this.
So now that we have the basic setup, let's improve it and make it work for vertical meshes too.
The "Triplanar" Improvement
You might be wondering why "triplanar" is in quotes. That's because we're not actually going to use a typical triplanar setup, and instead achieve our goals a different way.
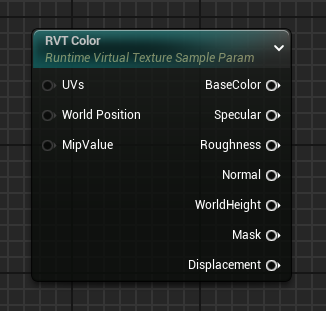
If we look at the RVT texture parameter, we can see that we have 3 inputs that we can override: UVs, World Position, and MipValue. In this situation MipValue isn't important to us, so we're going to ignore it.
In a typical implementation of Triplanar, we can manipulate worldspace UVs to show a different part of the texture depending on the normals of the mesh. So why doesn't this work for the RVT node?
It's because whatever you put into that UVs input goes through some extra calculations inside the node to account for the object's position in relation to the landscape's position. Since we can't opt out of doing those calculations, it makes adjusting the RVT uvs fairly difficult.
Instead, we're going to adjust the World Position input, by offsetting the landscape's RVT texture as the object mesh pixels get further and further away from the landscape. Let's look at the node breakdown.
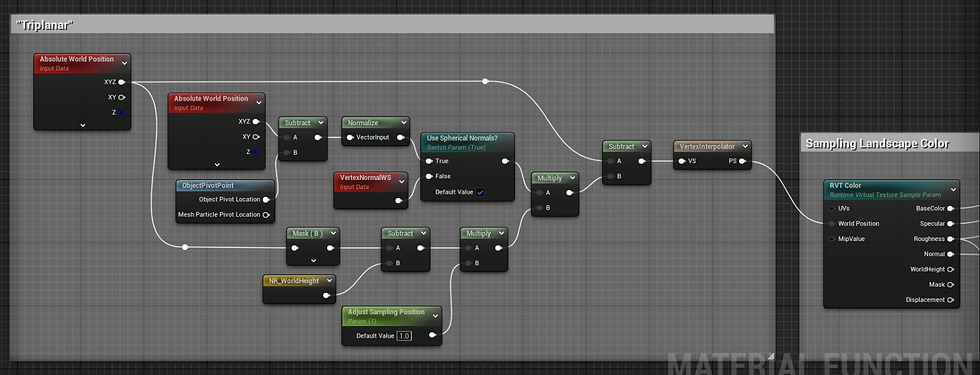
Basically, I'm taking the object's pixel's Z position and comparing it to the World Height from the RVT texture of the landscape. Then I multiply that by the Vertex Normals; this allows the offset to change direction depending on how the mesh is facing. And by subtracting this new value from the original world position, we have our new position that we can input into our RVT texture. Since the results of these calculations are the same whether it's pixel or vertex based, I piped these nodes through a Vertex Interpolator to make things quite a bit cheaper (and no loss of quality).
However, this current setup works best for objects that are fairly geometric with hard normals. For something like a rock that has rounded, softer normals for each face, this is where the Spherical Normals switch comes into play. With this flipped on, instead of using the vertex normals to determine the direction, we subtract the world position from the object's pivot position to create a smooth transition of normals for every pixel on the mesh. Applying these new normals to the direction of the offset allows natural objects like rocks to look great without any stretching. Hurray!